A statistical assessment of ductile damage in 304L stainless steel resolved using X-ray computed tomography
X-ray computed tomography (XCT) has been shown to reveal the true extent of ductile damage below the fracture surface of failed test specimens, which is often significantly underestimated when probed using 2D serial sectioning techniques and a microscope, since a single plane of material may only exhibit only a handful of resolvable voids.

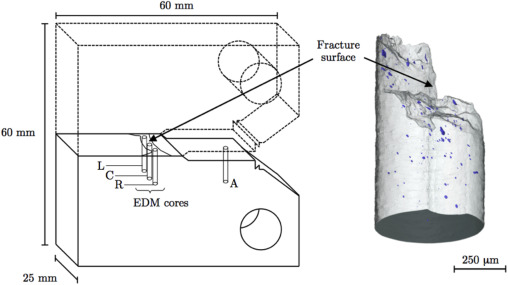
In contrast XCT offers the capability to generate large datasets consisting of hundreds, if not thousands, of individually resolvable voids, where each void can be characterised in terms of its distance to nearest neighbour, distance from the fracture surface, volume, orientation, amongst other parameters, or collectively in the form of void volume fraction. In order to probe the various stages of ductile failure in greater detail, where it may be possible to directly assign voids to the various stages of ductile failure using their individual geometric and location characteristics, it is essential that we determine methodologies to analyse such datasets. In order to give this study a material basis, we have employed the use of statistical methods to characterise differences in ductile void characteristics between two forms of stainless steel of the same grade (304L): one manufactured by hot isostatic pressing and the other by forging, since it has been shown previously that these materials display appreciably different fracture toughness properties. Through statistical sampling of the voids within these materials we aim to shed some light on the differences in mechanistic ductile fracture and the capabilities of XCT for probing mechanistic failure of materials.